Log4j Security Conundrum

It was quiet weekend and the world was struggling with pandemic recovery when the logging java application in some game server showed a surprising hive of activity which shouldn’t have occured.

Welcome to the cluster bomb of log4j which should have just done logging for java applications but instead , raised a whole of security vulnerabilities that most admins and DevOps people are still struggling to fix.

The case so far have following vulnerbilities raised

CVE-2021-44228 :

Apache Log4j2 2.0-beta9 through 2.15.0 (excluding security releases 2.12.2, 2.12.3, and 2.3.1) JNDI features used in configuration, log messages, and parameters do not protect against attacker controlled LDAP and other JNDI related endpoints. An attacker who can control log messages or log message parameters can execute arbitrary code loaded from LDAP servers when message lookup substitution is enabled. From log4j 2.15.0, this behavior has been disabled by default. From version 2.16.0 (along with 2.12.2, 2.12.3, and 2.3.1), this functionality has been completely removed. Note that this vulnerability is specific to log4j-core and does not affect log4net, log4cxx, or other Apache Logging Services projects.

Now as per the mitigation steps provided by Apache here you either upgrade to version 2.17 or above or delete the JNDIlookup class file from the log4j jar file.

As easy it sounds upgrading to latest version of log4j core has its own issue API compatibilty. You from version 2.10.x onwards the api’s have changed , so anyone upgrading directly from 2.1 or 2.2 to 2.17 will definitely face issue in functionality of their applications or webservices.

So its better to remove the JNDI lookup class for those versions ( And also for latter versions )

Now I have see some smart ass admins directly deleting the log4j-* files which will have other unintended consequence of applications crashing due to unavailable jar files

So better to run the following commands

zip -q -d $(find ./ | grep log4j-core ) org/apache/logging/log4j/core/lookup/JndiLookup.class

Update 1: it seems even though the steps are valid at the time of my publishing this, since its an ongoing CVE and more mitigation steps are coming, Apache has already update various versions of log4j with a fix so we do have a version 2.3.2 updated for Java 6 for the older versions of log4j (less than 2.10.x)
Quite a Basic Problem

Recently I had to face a quite a basic problem from a customer. Their /var/log/messages was not registering any installation message logs from our product installation scripts and the scripts were conking up with some issue.

tail -f /var/log/messages

Above command shows nothing. Before going to google I just checked if dmesg too  is acting and sure it was. After a 2 min google search which asked to check the status rsyslogd daemon, I did this

# systemctl status rsyslogd
Unit rsyslogd.service could not be found.

Et Voila.! So they didn’t have rsyslogd. I installed it and started the daemon and we had the systems log messages working.

# yum install rsyslog
# systemctl start rsyslogd

Is there a better way this cud have been found out. do let me know in comments

OpenVAS on Fedora

There is a requirement in the current OS Distro environments that we have proper screening of the Cloud Image distribution OS images for CVEs(Vulnerabilities) that are prevalent in the open . Keeping that in mind I used a basic version of OpenVAS running on Fedora 24 to scan the OpenStack images I get. I used the basic installation steps from here and adapted it for fedora.

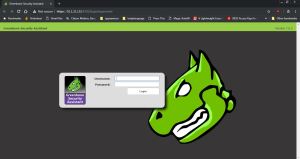
I get the following once I have set it all up

Login to it with the password. Once u can start a scan with machine which you have running ( or your own desktop if you may) with IP & login credentials as follows.

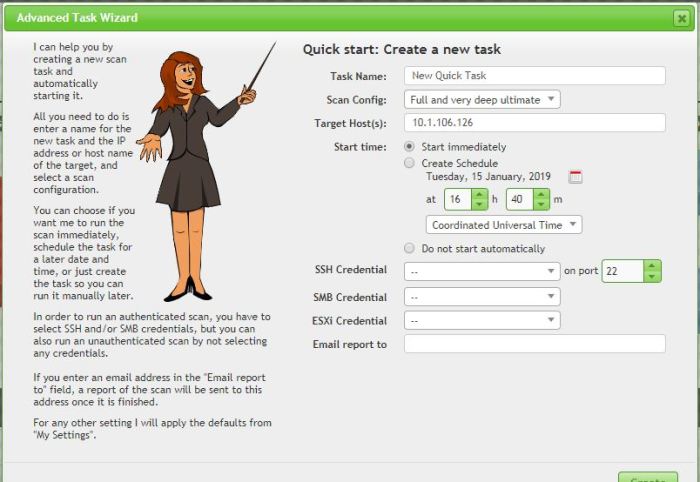
Scans > Tasks > and on top left corner > Advanced Task Wizards while gives the following pop up.

In the scan config better to select the Full and very deep ultimate. It gives a thorough scan and also worth the wait. The different types of scan can be found at

Configuration > Scan Configs

which gives the following page. Its upto you what type of scan you want.
.

Once you start the scan you can see the progress in Scans > tasks

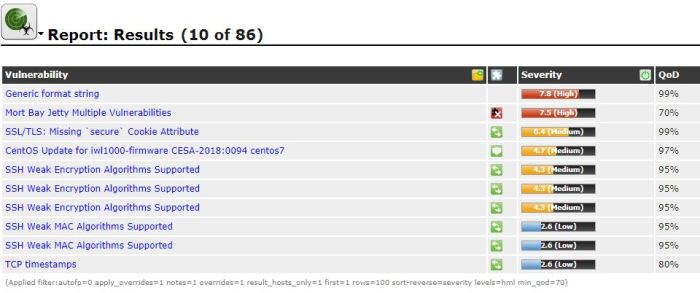
You can get the full log if you click the date under reports. This is an O/P from a scan I did on a CentOS 7.2 machine

You can click on each Vulnerability found and it will suggest on how to mitigate them. Pretty Cool huh!
Also there are other tools too which may give a more comprehensive results but I found this one to be good for Security audit for two things : 1 . Ease of Install 2. Ease of usage. Also frequently updated CVE lists.
Please do suggest the others if you found which is better or nicer in the comments , so i will try to review them

DNF & YUM

Most of you new fedora installers would have seen that yum has been replaced by dnf. It just means Dandified YUM . Yeah I can see most of you rolling your eyes. Well, anyway here it is.

For simplification purpose DNF is python3 implementation of YUM . It also other added improved features of like

  • documented API
  • improved dependency solving algorithm
  • refactoring internal functions.

But we are just lay users we just wanna know what is the alternative to

sudo yum install my-very-imp-pkg 

Well fedora folks have made it very easy, just replace yum with dnf

sudo dnf install my-very-imp-pkg 

Also if you have some wrapper scripts around yum commands , you can just search and replace them with dnf

Yeap its that simple and your are good to go. And its quite faster too

For more info: man dnf

sources :
http://dnf.baseurl.org/
https://en.wikipedia.org/wiki/DNF_(software)

Printer setup on Fedora

Now this is a tangent to my usual posts. I had a hard time installing my printer on linux until I found this utility and this is not just for Fedora, works as well for Ubuntu, Debian & CentOS

system-config-printer 

This was not installed by default and if you by choice or “coercion” 😉 moved to different DE say Mate, then its not easy to find where this will be

Now on fedora just do

sudo dnf install system-config-printer 

or yum install in case you are in an older versions of fedora. Then on System>Administration menu the printer settings shows up

Screenshot from 2015-08-25 23-33-59

Just Click on it and the following dailog box pops up

Screenshot

Usually it opens in user mode so that one can actually see what all printers are recognized and installed. If you happen to be an admin you can click on the unlock button you see to add a printer & since fedora 20 most(95%) of the printers in the market are recognized & the drivers are available for linux.

The steps for adding a printer is fairly straight forward and since I am assuming most of you are  tech savvy crowd I am not gonna elaborate the steps but the key thing here is the system-config-printer is applicable across any Desktop environment in Fedora.  No need to go for all cups localhost 631 circus stuff!!

For those who want next steps on adding printer click here

Serial Connection from a KVM Virtual Machine

Connecting to a machine through a serial line is a basic necessity if you happen to be an administrator of a server farm or lab. On a physical bare metal machine it easy to connect a null modem cable and configure & be done with it. So for a person who is done that would usually  hope to do it on VirtualSetup and if that happens to have no network connectivity initially  to do a ssh it is a very basic requirement.

This post  is geared towards linux hosts and guests with KVM and libvirt library,  with virt-manager.
This post is also geared for Guest Linux OS , more recent with systemd  to be exact. Since systemd has caused major changes in /etc folder we will be going over those few commands too.

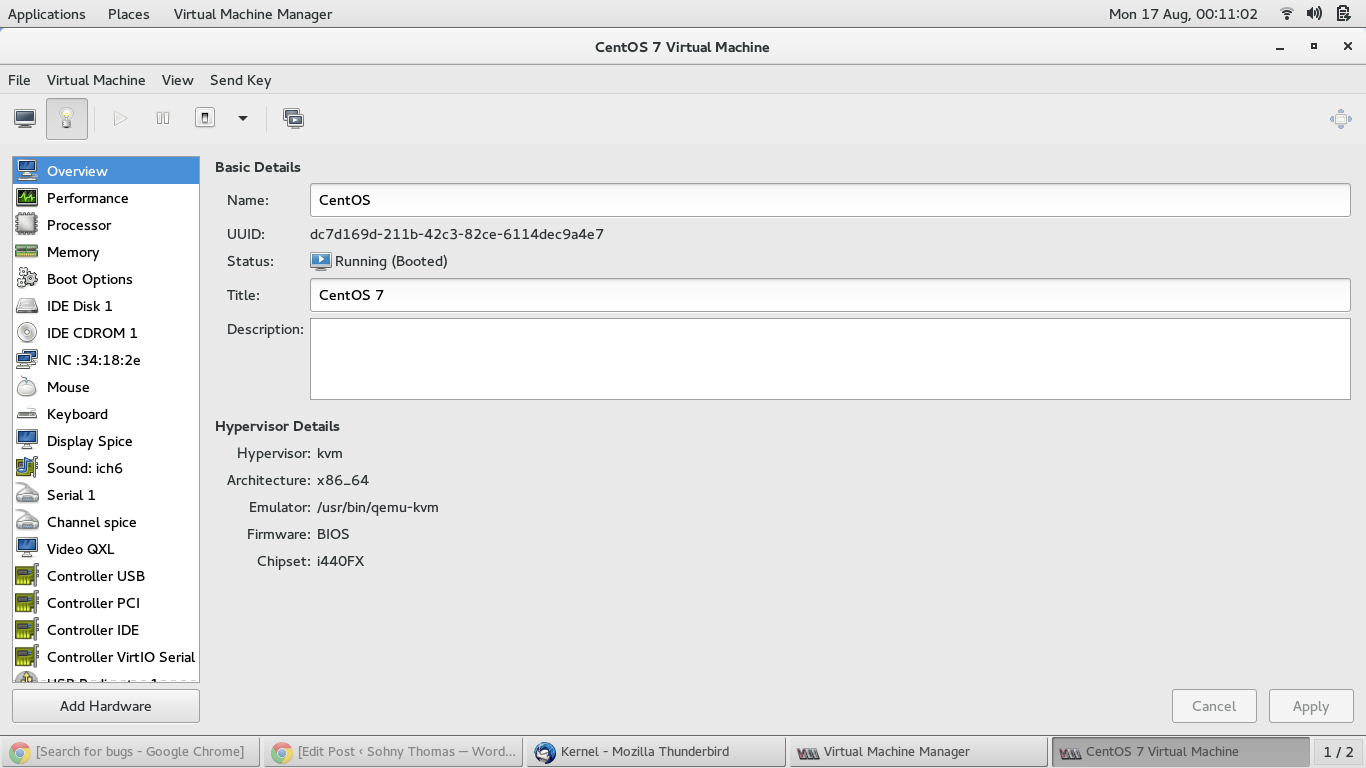
Here is a screenshot of an already running VM of CentOS 7.

Screenshot from 2015-08-17 00-11-02  Screenshot from 2015-08-17 00-13-19


As the second Image shows the serial is already created by default if you use virt-manager to create the VM. If its not present click Add Hardware to create one serial connection.  Once this is created you can connect to the serial by either:

virsh  console CentOS

or the VM number which is 4 in my case

virsh console 4

or the regular minicom connection

minicom -D /dev/pts/0

Once that is added the rest of the settings is part of CentOS Guest. We want the entire action that happens on the screen of the machine terminal to be present on the serial console too. Lets start with grub. This configuration is for grub 2. So we will edit the file

/etc/default/grub

The content of which will be :

GRUB_TIMEOUT=5
GRUB_DEFAULT=saved
GRUB_DISABLE_SUBMENU=true
GRUB_TERMINAL_OUTPUT="console"
GRUB_CMDLINE_LINUX="rhgb quiet"
GRUB_DISABLE_RECOVERY="true"

So edit the highlighted line and add two more line as shown:

GRUB_TIMEOUT=5
GRUB_DEFAULT=saved
GRUB_DISABLE_SUBMENU=true
GRUB_TERMINAL_INPUT="console serial"
GRUB_TERMINAL_OUTPUT="console serial"
GRUB_SERIAL_COMMAND="serial --unit=0 --speed=115200 --word=8 --parity=no --stop=1"
GRUB_CMDLINE_LINUX="rhgb quiet"
GRUB_DISABLE_RECOVERY="true"

We have added the INPUT and OUTPUT so that we are able to view and also change at the grub prompt or pause the countdown to default OS. We also added the serial terminal baudrate and 8 word parity, which can also be used on baremetal setup too ,though it doesn’t matter in a VM setup.

Moving on we need to see what the kernel does. So lets edit the grub config for the kernel command line parameter.

/boot/grub2/grub.cfg

search for the linux16 line under the CentOS boot menuentry, which should look like this

linux16 /vmlinuz-3.10.0-229.el7.x86_64 root=/dev/sda1 ro rhgb quiet

Edit it and add the serial specific config as follows, you can remove the quiet part if you want the kernel to spew out everything at you .

linux16 /vmlinuz-3.10.0-229.el7.x86_64 root=/dev/sda1 ro rhgb quiet console=ttyS0,115200 console=tty0

Save the grub.cfg and exit. This sets up the kernel to show all its messages on the serial.

The last part is to make sure you are able to login on serial console. Now this is tricky in systemd machines , earlier it was simpler to edit /etc/inittab or /etc/init.d/serial-ttyS0.conf. Not Now.

Now you need to start the getty service on ttyS0

systemctl start serial-getty@ttyS0.service

and to permenantly run it every time

systemctl enable serial-getty@ttyS0.service

And one more thing edit /etc/securetty and add ttyS0 to it so that you have permission from selinux to be able to login

Thats it, now reboot and watch the magic happen and let me know in the comments on any issues you face


Hibernating in Fedora 22

Hibernation in Fedora 22 is not enabled by default, only the suspend part is enabled .
Even if you give the following command it just gives a fresh system after resume

systemctl hibernate

One needs to enable it in certain scripts for it to function properly. Following are the steps to enable it

– Enable Recovery from a hibernate in grub bootloader settings file

  - /etc/default/grub

The contents will be as follows

 GRUB_TIMEOUT=5
 GRUB_DISTRIBUTOR="$(sed 's, release .*$,,g' /etc/system-release)"
 GRUB_DEFAULT=saved
 GRUB_DISABLE_SUBMENU=true
 GRUB_TERMINAL_OUTPUT="console"
 GRUB_CMDLINE_LINUX="rhgb quiet"
 GRUB_DISABLE_RECOVERY="true" 

The last line is what matters to us : GRUB_DISABLE_RECOVERY should be set to false. So edit it , replace true to false and it should look like this . If the line is not present , dont worry, just add it

 GRUB_TIMEOUT=5
 GRUB_DISTRIBUTOR="$(sed 's, release .*$,,g' /etc/system-release)"
 GRUB_DEFAULT=saved
 GRUB_DISABLE_SUBMENU=true
 GRUB_TERMINAL_OUTPUT="console"
 GRUB_CMDLINE_LINUX="rhgb quiet"
 GRUB_DISABLE_RECOVERY="false"

– Enable kernel parameters for resume

Enable resume in kernel parameters of grub bootloader so that it resumes from image in the swap partition. So in the following file edit the line for your fedora vmlinuz boot line

  /boot/grub2/grub.cfg

Make sure you edit the proper line by checking the uname command for the kernel version. Mine was 64 bit fedora 22 running kernel 4.0.5-300 , so the following line needs to be edited.

linux16 /boot/vmlinuz-4.0.5-300.fc22.x86_64 root=/dev/sda1 ro rhgb quiet

At the end of the above line add resume=/dev/sda3, assuming ofcourse sda3 is your swap partition

linux16 /boot/vmlinuz-4.0.5-300.fc22.x86_64 root=/dev/sda1 ro rhgb quiet resume=/dev/sda3

Thats it, now reboot the system and hibernate away!! 🙂 let me know in comments any issues you face.

Note: FC-22 mutter package gives some issues once after resume, just update it to version 3.6.3-2